


Related Posts

The Bridal Tan Edit: The perfect tan for "I do"
Create the perfect wedding day tan with a bridal service built around confidence, customization, and zero stress. CONSULTATIONStart with a trial tan to customize color, rinse time, and prep recommendations before the big day. CLEAR SOLUTIONA bridal favorite for artists because it develops without cosmetic bronzer, helping reduce bronzer transfer concerns. PRO-LAB ADD-ONSCustomize the experience with Hydration Lift, Collagen Boost, Vitamin Bath, or DHA Boost. The Bridal Standard Bridal tans are more than another appointment on your books. They are one of the most important tans your client will ever receive. A trial tan allows you to build trust, perfect the shade, and make sure your bride feels confident before wedding week. For the final appointment, recommend tanning 1-2 days before the wedding so the color has time to fully develop and settle into the skin. Build the Bridal Experience TRIAL TANCustomize the bride's color, discuss prep, and set expectations before wedding week. FINAL TANBook 1-2 days before the weddings for beautiful, developed color. LUXURY ADD-ONUse the Professional Spray Tan Additives Kit to personalize each bridal tan.
Learn more
How to Choose a Spray Tan Certification Program
Table of Contents What's Covered in Spray Tan Training What to Look for in a Spray Tan Certification Program Frequently Asked Questions The field of sunless spray tanning is a rapidly growing corner of the beauty industry. Everyone wants that healthy, radiant glow that makes their skin look flawless and sun-kissed, but without fiddling with at-home foams or risking sun damage. There's never been a better time to become a professional spray tan artist. But where do you start? Obtaining your spray tan certification lends you the credibility and experience you need to get started on your journey. With the growing popularity of sunless tanning, having this specialized training can set you apart in the field and reassure potential clients that you know your way around a spray gun. Where you learn your spray tan technique makes all the difference. In this comprehensive guide, we'll cover everything you need to know about choosing the right spray tan certification program. Let's dive right in and put you on the path to obtaining your professional spray tan certification today! What's Covered in Spray Tan Training A great certification program is the blueprint for a flourishing career, ensuring you master the art and science of sunless tanning. The important thing to remember is that, as a professional spray tan artist, your education never really ends. Sunless tanning is a dynamic field that's always advancing, and you can always step up your artistry by studying new techniques and learning from other experts in the field. Premier certification courses focus firstly on establishing a fundamental understanding of the process and products, and then layer on the advanced techniques that turn a basic tan into a customized, high-end service. We'll walk you through the essential lessons you can expect to master in a top-tier training course. Foundational Basics How far away from the skin should you hold your spray gun? How will this product react if your client is wearing sunscreen? Mastering the basics of professional spray tanning is the first step towards building a successful career as a spray tan artist. Before you start learning advanced techniques, you need to know how to build that perfect, natural-looking tan using your basic tools. A foundational course of spray tanning basics should cover: • General overviews of sunless tanning: This foundational lesson dives into the science of DHA (dihydroxyacetone) and how sunless tanning solutions work with the skin. Students learn about the entire sunless process, including the history of the method and how Norvell's system provides proven, consistent results. • Colorology training: Getting the right shade requires more than a guess. Colorology training focuses on color theory and skin tone analysis to ensure a natural-looking tan every time. Students gain expertise in matching solutions to different skin tones and learn proper product selection for customized application. Custom color matching is a critical skill for preventing undesirable orange or muddy results. • Product training: In-depth product education and learning the best practices for equipment maintenance is essential. You'll learn how to properly clean, handle, and maintain your spray tan equipment to ensure consistent, professional spray sessions. Specialty Tanning Techniques The fundamentals of spray tanning are typically all you need to obtain your certification. But the more specialized and precise your technique, the better service you can provide to your clients. Three essential advanced spray tan techniques that spray tan training programs should offer include: • Contour tanning: Contouring is the key to elevating your client's final look beyond a basic all-over tan. Contour tanning uses strategic shading and highlighting to sculpt the body and enhance a client's natural features. Students learn how to define muscle tone, slim the waistline, and create a toned appearance. • Color matching: Color matching involves harmonizing the tanning solution with the client's natural undertones, preventing common issues like an orange or muddy result. Students gain expertise in color theory, skin type analysis (like the Fitzpatrick Scale), and selecting or blending solutions to achieve a highly customized, flawless tan for every client. • Spray tan maintenance: Spray tan maintenance focuses on teaching artists how to educate clients on pre-tan preparation and crucial aftercare to ensure a long-lasting, even result. Students learn expert strategies, aftercare tips, and product recommendations to help clients maximize their tan's longevity. What to Look for in a Spray Tan Certification Program Choosing the right certification program is the first, most critical step toward launching a successful career in sunless tanning. With so many options available, it can feel intimidating to select the one that will truly prepare you for the demands of the salon and the expectations of your clients. The goal of a spray tanning certification course is to equip you with the skills, confidence, and resources necessary to thrive in a competitive market. Here's a breakdown of the key factors to evaluate as you decide where to invest your time and money. Hands-On Training With Experts Access to seasoned, knowledgeable instructors is one of the most valuable assets a training program can offer. The truth is that almost anyone can operate a spray gun. Working with professional instructors who have real-world experience and have honed their skills through advanced training is the only way to enter the world of spray tanning with confidence and the skillset to back it up. Some spray tan training programs are entirely self-paced online, while others are fully in-person. There are also hybrid options, in which an online training program includes in-person workshops. Regardless of the format, the certification course should blend theoretical and practical aspects of spray tanning so that you're prepared to enter the field. A Comprehensive Curriculum The best spray tan certification programs go beyond the basics. The opportunity to learn advanced specialty techniques like contour tanning and color matching is worth its weight in gold. You'll come away from your training with a complete toolkit that allows you to bring in more clients and keep them happy. This level of expertise yields several key professional benefits: • Better Results and Efficiency: Advanced training improves the quality of the final result and helps artists shorten their appointment times. • Higher Earning Potential: Artists who master these specialty techniques can justify higher pricing, leading to stronger rebooking rates and a higher overall salary over time. • Competitive Edge: By offering services that go beyond a basic all-over tan, artists can offer their clients a premium package of salon spray tanning services and consistently flawless results they can't get just anywhere. Ongoing Professional Support What happens when you complete that last course and receive your spray tan certification? Without support, it can be difficult to break into the industry and actually start booking clients. And beyond that, you'll find yourself struggling to keep up with an always-evolving industry. When choosing a certification program, look for one that provides you with professional resources beyond the initial training program, like continuing education, refresher courses, online communities, and one-on-one support. Courses like the spray tanning program at Norvell University™ don't just hand you the fundamentals you need to break into the spray tan industry; NU is the #1 Spray Tan Certification Program in the country, which means that training with us makes you part of a community of more than 30,000 artists who have mastered the art of tanning. Frequently Asked Questions How Much Does Spray Tan Certification Cost? It varies by program. Online courses typically cost less than immersive, hands-on training or more advanced programs. At Norvell, our Core Sunless Online Training is $149.00, or free when you buy qualifying spray tan equipment. Do Spray Tan Professionals Have to Be Certified? Legally, no. Spray tan professionals do not need a license or certification to operate in most states. However, certifications from organizations like Norvell may be necessary to get liability insurance. How Long Will It Take for Me to Receive My Spray Tan Certification? After you complete our self-paced online training or in-person training sessions, your PDF copy will be available for download immediately after successful completion of the entire course. If you would like a printed certificate of achievement, or it is required by your institution, submit the form at the bottom of the Certificate page inside the Course. It may take 4-6 weeks to receive. NOTE: If you're outside the contiguous United States (US-48) there is a PDF certificate available at the end of the Core course, a printed copy will not be mailed. Related Posts How to Choose a Professional Spray Tan Solution for Artists and Salons Learn More Spray Tan Artist Salary: How Much Do Spray Tan Artists Make? Learn More DHA: The Science Behind Sunless Tanning Learn More
Learn more
Mastering the Art: The Complete Guide to Professional Spray Tan Technique
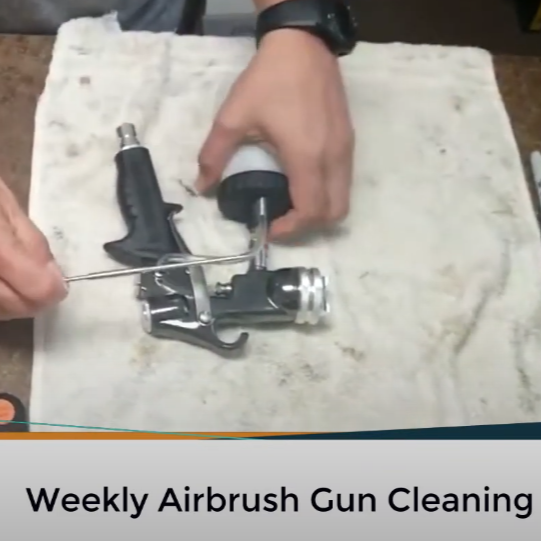
Table of Contents Proper Skin Prep Before a Spray Tan Advanced Spray Tan Techniques Pro Troubleshooting Continue Your Mastery with Norvell University Frequently Asked Questions Technique is everything when it comes to building a spray tan career. Anyone can buy a bottle of self-tanner and attempt a DIY tan, but a professional tan done by a skilled artist is a luxury experience. Learning advanced spray tan techniques that emphasize customization and consistent, natural-looking results can help you excel in your career and retain clients who feel comfortable and confident when their session is over. This guide will explore some of the most useful advanced techniques for a professional spray tan artist, including body contouring and color matching. We'll explore common client concerns and application issues, as well as how to fix them. If you're just starting your journey to learn how to spray tan, check out our online courses for beginners. The Importance of Proper Skin Prep Before a Spray Tan One of the most important factors that ensures predictable, even spray tan results is proper skin preparation. Think of yourself like a painter: if your canvas isn't prepped, your spray tan application can go on blotchy and uneven, no matter how skilled your technique is. But starting out with a smooth, clean canvas that's primed for paint means that your color goes on exactly as you'd expect, with the color consistent in every spot. Your clients' skin works the same way. Dry, uneven skin can cause the end result to look darker or lighter from area to area. For best results, always apply spray tan solution to skin that's clean, smooth, oil-free, and exfoliated evenly. Encourage your clients to exfoliate 24 hours before their appointment and to avoid oils, lotions, deodorant, and other products on the day of their spray tan. Advanced Spray Tan Techniques Fine-tuning your professional spray tan technique for consistency keeps clients coming back to your salon. Let's explore some advanced techniques that every tech should have in their arsenal to help provide sun-kissed quality in every service. The Art of Contouring: Defining Muscle and Enhancing Features Getting to know your client and their skin before any solution is applied adds natural depth and definition to a spray tan, helping you create natural-looking results. Contouring is a key part of this. Mastering the art of all-over body contouring is an advanced-level spray tan technique that will set you apart from other salons and have your clients leaving satisfied. With strategic shading and highlighting, spray tan contouring offers: • Muscle definition: Contouring can be used to accentuate muscles for a more toned and fit appearance, helping your clients carry themselves with confidence. • Youthful radiance: Contouring on the face, neck, and collarbones provides a radiant look that feels youthful and refreshed. • Subtle sculpting: Many clients think of contouring as a technique used to achieve dramatic results. But skillful contouring can enhance natural beauty with subtle sculpting that highlights all the right areas. Discuss contouring with your client during their appointment to get a better understanding of what they want to emphasize or highlight with their tan. As their technician, you can suggest areas for subtle contouring that will give them a confidence boost, like abdomen toning or cheekbone sculpting. @norvelltanning PRO TIP with Jackie on how to spray tan hands #spraytanartist #fyp #tanning #tan ♬ original sound - Kenaniah Mastering Hands, Feet, and Face: The Ultimate Blending Techniques Developing a consistent spray tan technique from nose to toes guarantees an even, all-over glow. Areas like the face, feet, and hands require a gentle yet precise application. A light mist and subtle blending prevent tanning solutions from getting too dark. Spray tan tips and tricks for face, neck, hands, and feet: • Cover the area with light misting: Applying the tanning solution too aggressively will result in an uneven tan. Increase spray distance to 12 inches when spraying face, hands, and feet. Avoid excessive layering to prevent build-up or discoloration. • Choose the right solution: Tanning solutions with a hydrating, anti-aging formula are great for use on the face, neck, hands, and other areas that often show the first signs of aging. Look for ingredients that offer Vitamin C or Vitamin E, which stimulate collagen and reduce wrinkles. • Check symmetry: With face application in particular, it's important to make sure the application is even and symmetrical. When using handheld spray tan equipment, we recommend pausing occasionally to make sure the application is symmetrical on both sides of the face. • Master blending: For a natural look, blending is essential. On the face and hands, skin naturally has lighter and darker areas. Using a blending cream prior to the session can ensure a natural-looking transition. Communication should also be maintained consistently during appointments. Explain proper positioning to your clients and emphasize that holding their bodies a certain way during the process will result in an even sunless tan. This involves: • Holding their arms slightly away from their bodies • Spreading fingers apart to ensure the product reaches every area • Lifting heels to allow for full leg coverage Color Customization: Working With Different Undertones Professional spray tanning requires working in harmony with a client's natural undertones. To avoid muddy or orange results, fair skin typically benefits from brown or violet-based formulas, whereas olive skin can support deeper bronzing agents. Selecting a product line with a diverse range of bases allows you to easily customize each application for a flawless finish. Undertones generally range from cool tones like bronze or violet to warm tones like gold or rose gold. The undertone of the solution you go with can have a dramatic influence on how well the solution complements your client's skin tone. Professional spray tan artists follow the Fitzpatrick Scale to understand skin types, with the range covering very fair to the deepest skin tones: • Type 1–2: Very fair to fair skin that's sensitive and prone to redness. • Type 3–4: Light to medium skin that typically tans to light brown. • Type 5–6: Deeply pigmented skin tones that tan easily. Pair undertone correction techniques with the Fitzpatrick system to achieve highly customized and natural-looking results. To learn more about spray tan colorology, see Norvell's Colorology Spray Tan Shades Chart. Adapting Your Technique for Different Body Types One of the secrets to great spray tan application is simply understanding that every client's body type is different. Adapting your spray technique to your client's specific body type leads to more natural results that leave them feeling confident and comfortable in their skin. Here are a few spray tan tips and tricks for adapting your application for different body types: • Always make your client feel comfortable: During a session, clients can feel vulnerable about their body shape and specific areas they're concerned about. Approach the discussion with compassion and keep things light. Ask them if they're getting a spray tan for a fun event or upcoming vacation, and walk them through various positions for the best possible session. • Start with the breasts: If your client has a larger bust, it's important for them to lift their breasts so that you can lightly mist the area with the solution. This should be the first step during the tanning session. Intentionally mist the under-breast area with even application to ensure this area blends with the rest of the tan. Do not saturate the under-breast area. • Dry as you go: Before spraying each area, ensure the skin is completely dry and free of sweat, deodorant, and heavy lotions — all of which can block even solution absorption. • Position the body strategically: Again, this is where having an understanding of your client's body is essential. The way you instruct your client to bend or stretch influences how the solution applies to the skin. For areas like the back and buttocks, bending during application can prevent lines and uneven coverage. Pro Troubleshooting: Solving Common Application Issues No matter how advanced your technique, every professional spray tan artist occasionally encounters application issues or client concerns. Learning how to identify and quickly solve these problems is a hallmark of truly mastering your craft. Let's discuss the most frequent application challenges and explore expert solutions. The Problem: Patchiness or Streaking Often, streaky or patchy tans are the result of inadequate skin prep before the session. Dead skin, lotions/oils, and other residue can create barriers on the skin that prevent the solution from absorbing. The tanning solution can also react with any skincare products on the skin and leave areas dry, patchy, or discolored. Streaking can also happen because of inconsistent application. It's important to keep your spray pattern even and vary the distance depending on which area of the body you're spraying. The Solution: Educate your clients on correct skin preparation for the day before and the day of the session. Aftercare can also be a factor: instruct your clients to avoid tight clothing, excessive sweating, or swimming before their tan develops. Post-tan rinse technique can also cause streaking. After 8-10 hours, clients can rinse with warm water (no soap) and gently pat dry to avoid streaking. The key is to gently glide hands over the skin, as scrubbing can create streaks. The Problem: The "Too Dark" Tan Areas of the skin that get too dark after the tan develops are a common concern. One of the reasons this can happen is uneven pressure during application. Oversaturation and inconsistent spray patterns can result in uneven coverage that makes some areas of the skin look way too dark. Cuts, scars, or uneven skin texture can also cause the solution to develop darker in certain areas, which is unavoidable. Hyperpigmentation and age spots are another factor worth noting. Because these areas absorb DHA just like the surrounding skin, they will darken proportionally, resulting in a "you but darker" effect. To minimize this, apply a small amount of barrier cream directly to hyperpigmented spots using a Q-tip before spraying to limit solution absorption in those areas. If the tan is too dark all over, it's usually because the wrong spray tan color was used. The Solution: To prevent a too-dark tan, make sure you're selecting the right shade for your client's skin tone. Some dark spots are unavoidable, so warn your client that blemished or scarred skin may develop darker. If your client is concerned that their tan is too dark, talk to them about fading their tan at home. Exfoliating the dark areas in the shower with a scrub or mitt can help the tan fade. They can also use a body oil or oil-based body wash to further break down the tanning solution. The Problem: Uneven Fading on Legs and Arms Like patchy application, uneven fading is often the result of insufficient skin preparation or client aftercare. Client education should be at the heart of your professional spray tan technique. Uneven fading around the legs and arms typically happens if clients wear tight leggings, long-sleeved tops, or other restrictive clothing after their tan. Lotion or oil residue on the skin prior to application, as well as excess sweating in these areas during application, can also cause this issue. The Solution: Offer your clients plenty of literature explaining the correct way to prepare for a spray tan and how to care for their tan during the crucial development process. Talk them through the guidelines and answer any questions they have to ensure that you're both happy with the results of your session. Continue Your Mastery with Norvell University These techniques are just the beginning. Gain a partner on the road to mastering advanced spray tanning techniques when you enroll in courses at Norvell University. We offer premier spray tan training for professionals wanting to break into the industry with a toolkit of techniques that ensure consistent, natural-looking results and happy repeat clients. In our Master Hands-On Skill Training through our Academy program, you can learn all of these advanced techniques to sharpen your spray tan toolkit. Mastering the techniques is only one piece of the puzzle. Norvell University provides continuous education opportunities that help you launch your career as a professional spray tan artist: • Professional resources for all skill levels • Discounts on Norvell spray tan equipment and products • One-on-one support • Industry networking and online communities Explore Norvell University Courses Learn How to Spray Tan with Norvell Whether you're a seasoned professional or just dipping your toes into the industry, Norvell's professional education and resources offer practical guidance for spray tan artists of all skill levels. Our courses cover advanced techniques like contour tanning, custom color matching, and tan maintenance. Enroll In Norvell University Today! FAQ: Spray Tan Techniques Learn more about advanced spray tan techniques through our frequently asked questions. What is the point of blending cream? Blending barrier creams are applied before the tanning session to prevent over-darkening that's common with DHA bronzing sprays. When and where should I apply drying powder? Drying powders are formulated for all-over use. We recommend using drying powder immediately after a sunless tanning session. For sweat-prone areas like under the breasts and arms, you can apply drying powder intermittently during the session before moving on to the next area of the body. What kind of spray tan equipment do I need? It depends on your business. If you're a mobile spray tan artist, choose a system that's compact and lightweight. If you're working out of a salon, larger systems with quiet motors offer the best client experience. To learn more about your options, read our blog on choosing a spray tan machine. Related Posts How to Choose a Professional Spray Tan Solution for Artists and Salons Learn More Spray Tan Artist Salary: How Much Do Spray Tan Artists Make? Learn More DHA: The Science Behind Sunless Tanning Learn More
Learn more